Getting started
You may find qmTunnel useful if you need (all features are optional):
- to secure your connection with SSL/TLS;
- to connect to hosts/networks behind NAT/firewall;
- to compress your traffic;
- to detect silent packet drops and disconnections (by enabling heartbeats);
- to allow short-time disconnections between tunnel hosts with no application disconnections;
- to add additional authentication level to tunnel hosts;
- to automatically re-establish the tunnel on disconnections (permanent tunnel);
- to establish tunnel only when needed (on demand).
Installation
You can either download binaries or build the project from sources.
Binaries download link: http://qmtunnel.com/download/
At the moment the binaries are provided without any installation tools or scripts and for Windows (compiled in 32-bit) only. You just need to unpack the files and put them into some directory.
You can also see section Building from source for build instructions on Linux platforms.
Setting up qmTunnel server instance
When you first run qmtunnel-server process in GUI mode, it will ask you to
set up your qmTunnel server instance certificate:
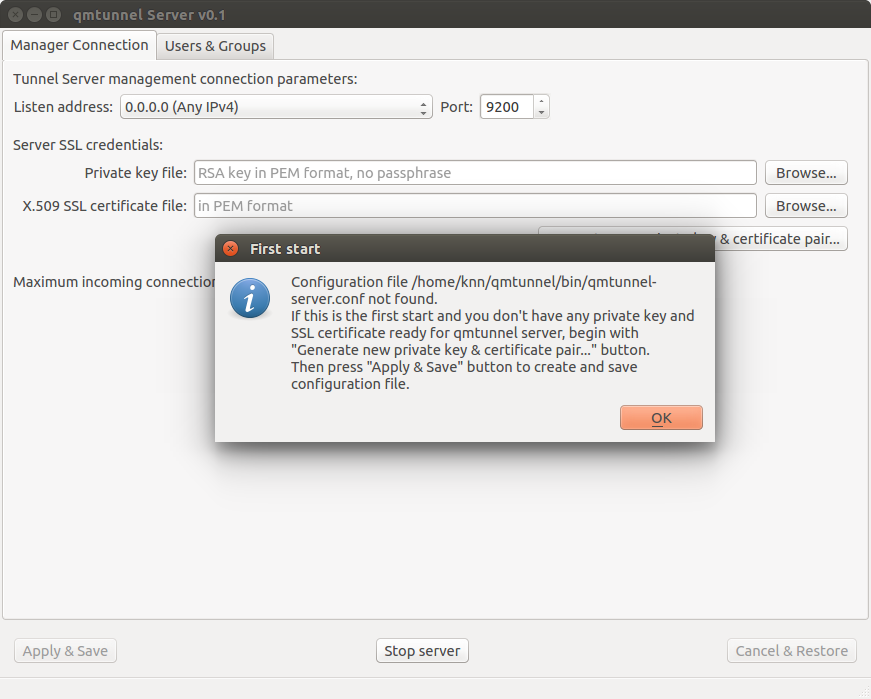
Click OK and then Generate new private key & certificate pair....
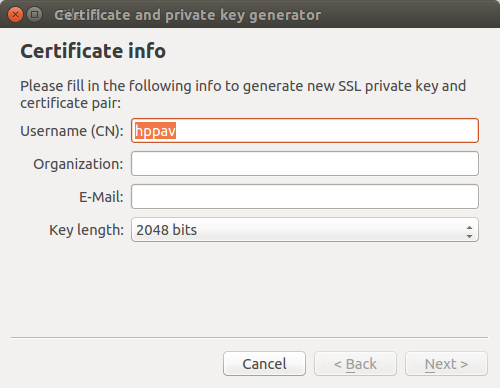
Edit Username (CN) and Key length if neccessary and press Next >.
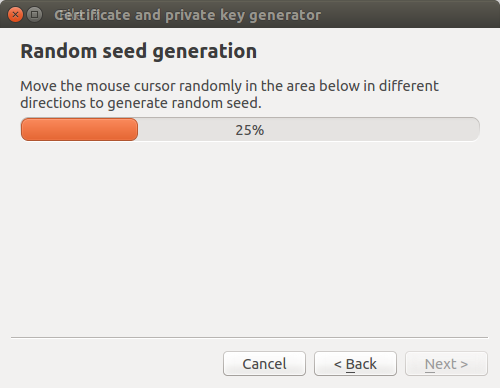
Randomly move your mouse cursor over empty space inside the wizard window to generate
better random seed. Then press Next >.
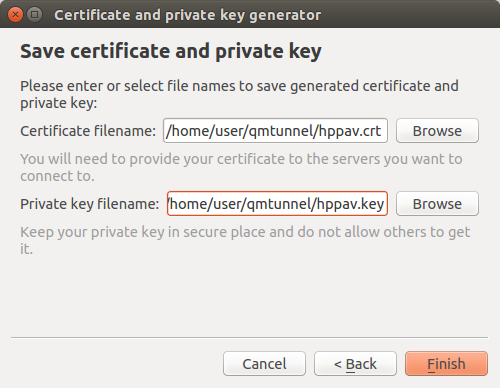
Edit file paths and press Finish.
Note
Please ensure that you keep your private key in a safe place and do not give access to it to anyone except this qmTunnel server instance.
Your server private key and certificate is ready! Press Apply & Save button in
the bottom.
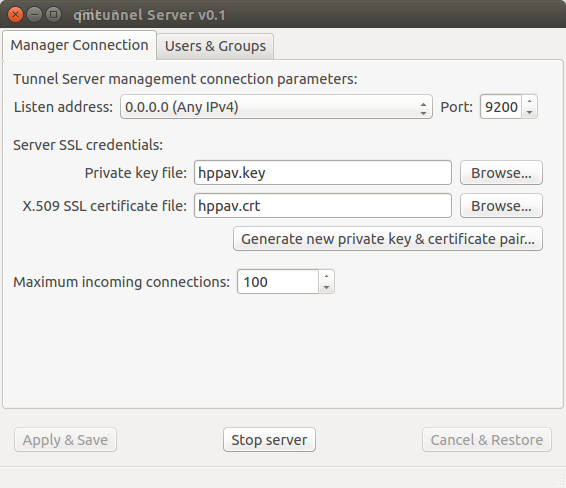
You can also change the TCP Port on which qmTunnel operates (if neccessary)
and choose specific Listen address if you don’t want qmTunnel to accept
connections from all available networks.
OK, now our first qmTunnel server is up & running.
Repeat the above setup steps on at least one other host to have at least two qmTunnel servers running. Let’s suppose that the first qmTunnel server would be at the client side, and the second one would be on destination server or network.
Setting up qmTunnel GUI
In order to create, modify and monitor tunnels and manage qmTunnel servers you need to run
separate application called qmTunnel-gui.
When you first run qmtunnel-gui, it will also ask you to set up your personal
private key and certificate which will be used to connect to and manage qmTunnel servers:
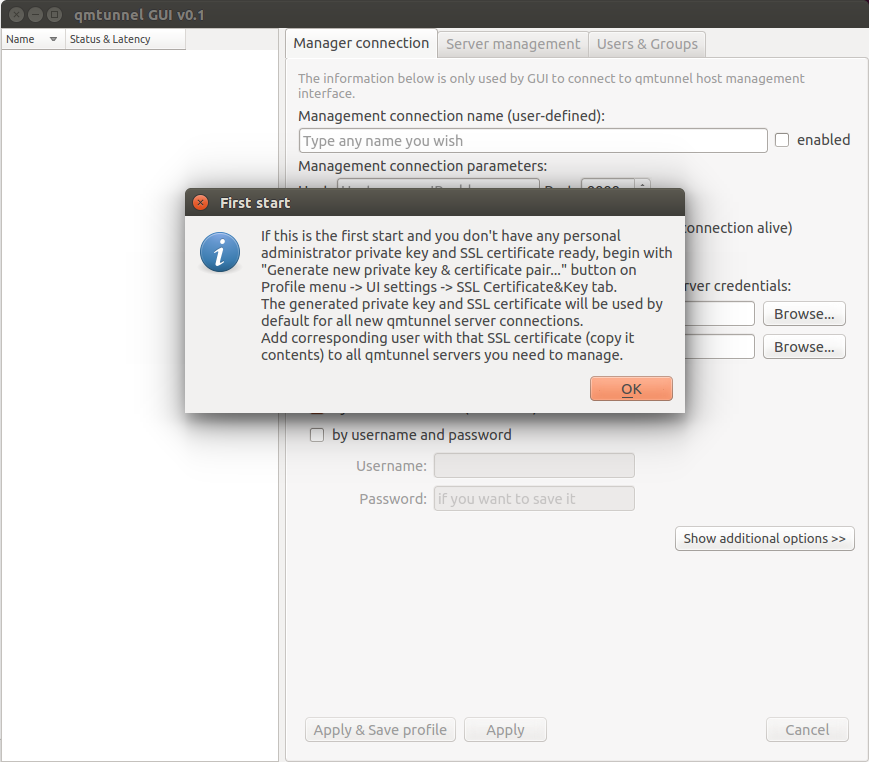
Click OK and User Settings dialog would pop up, where you can then press
Generate new private key & certificate pair... button and then repeat the same
steps as for server certificate.
If you missed User Settings dialog, you can call it from main window menu Profile
-> UI Settings... and then go to SSL Certificate&Key tab.
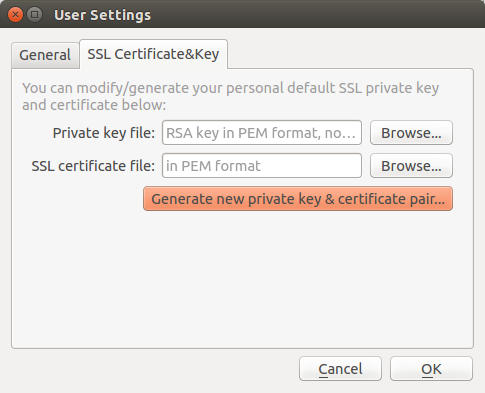
This private key and certificate will be used by default to connect to qmTunnel servers.
Connecting to qmTunnel server from GUI
qmTunnel server requires user or other server’s certificate to authorize incoming connection.
Once you have created your personal certificate in qmtunnel-gui (see above),
you can copy&paste the contents of this certificate in qmTunnel-server:
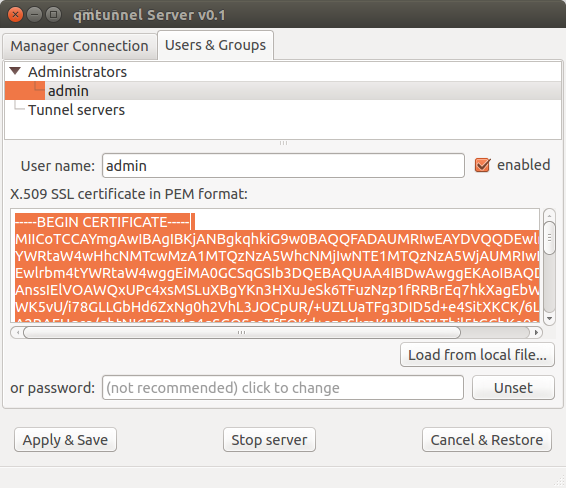
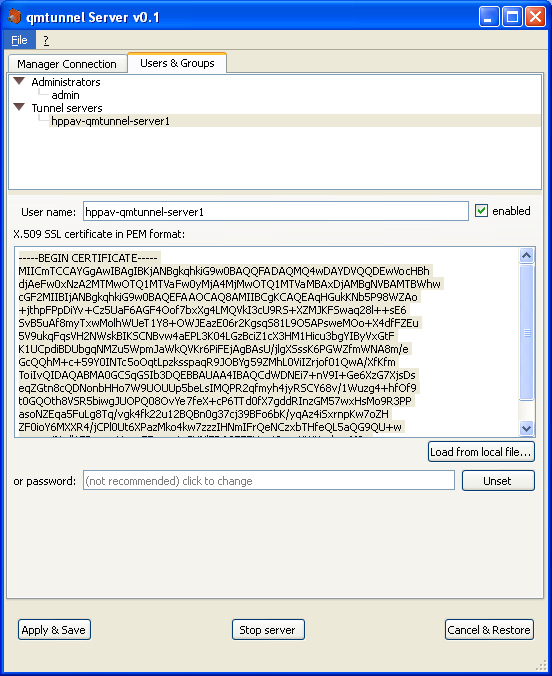
In qmtunnel-server user interface there is tab called Users & Groups which allows to manage
access to this qmTunnel server instance.
By default, there is an Administrators group with full access and one admin user
without certificate. Just select this admin user in the list and paste your personal
certificate contents into corresponding field.
Do not forget to press Apply & Save button after any modification.
OK, now return to qmtunnel-gui application.
At the left part of the main window there is a list of qmTunnel servers available. At the moment
it’s empty, so right-click on this list and select Add tunnel server... from the context menu:
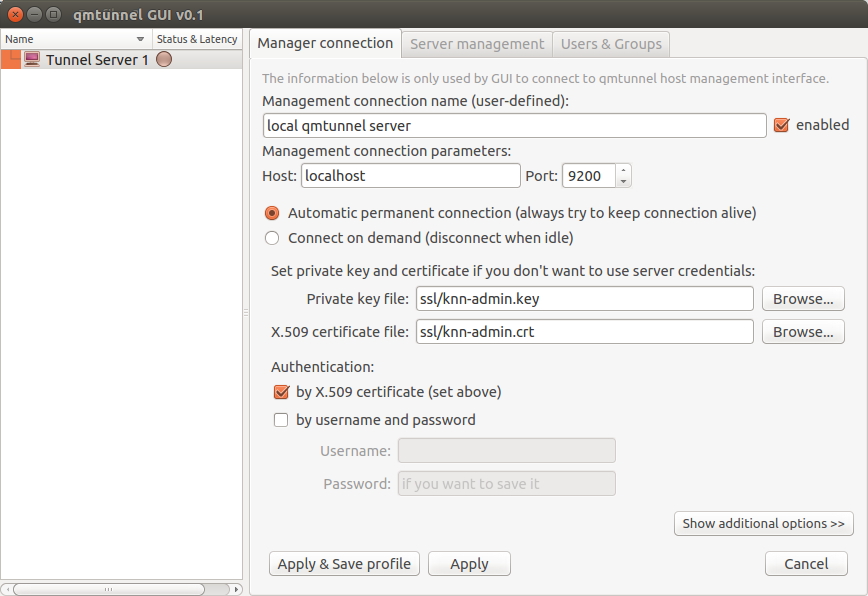
There is not much info required to enter here. Just enter something in the Management connection
name, enter qmTunnel server IP-address or domain name (localhost if on the same host) in
Host field, and port (if changed in qmtunnel-server).
There are many additional settings which are available by clicking Show additional options
button, but in most cases you’ll be fine with defaults.
OK, now press Apply & Save profile button and choose a file to store your profile
(qmTunnel servers list) in.
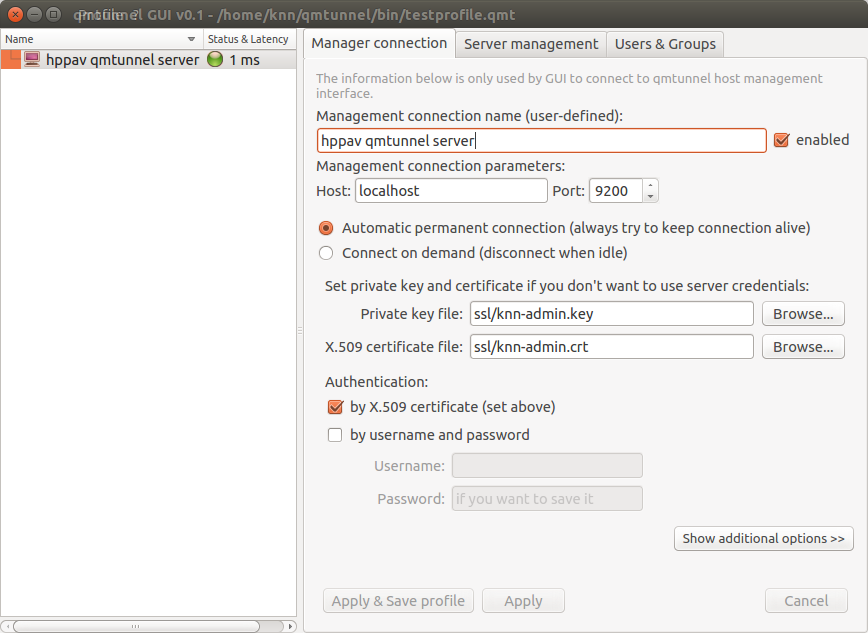
Now the green indicator shows that you have successfully connected to your first qmTunnel server.
You can now use qmtunnel-gui to configure this qmTunnel server. Use Server management and
Users & Groups tabs for this purpose.
Creating tunnels from GUI
In order to create a tunnel, you first need to ensure that any of your qmTunnel servers “know” previous qmTunnel server in chain.
In the current example, we need to authorize our first qmTunnel server on the second qmTunnel server.
There is a pre-created user group called Tunnel servers which we can add our first server to:
Do this on the second qmTunnel server.
To add user to the group, right-click on the group and select Add user.... Specify any
user name your want, just make sure to paste correct server certificate.
Press Apply & Save. Now the first qmTunnel server can connect to the second one.
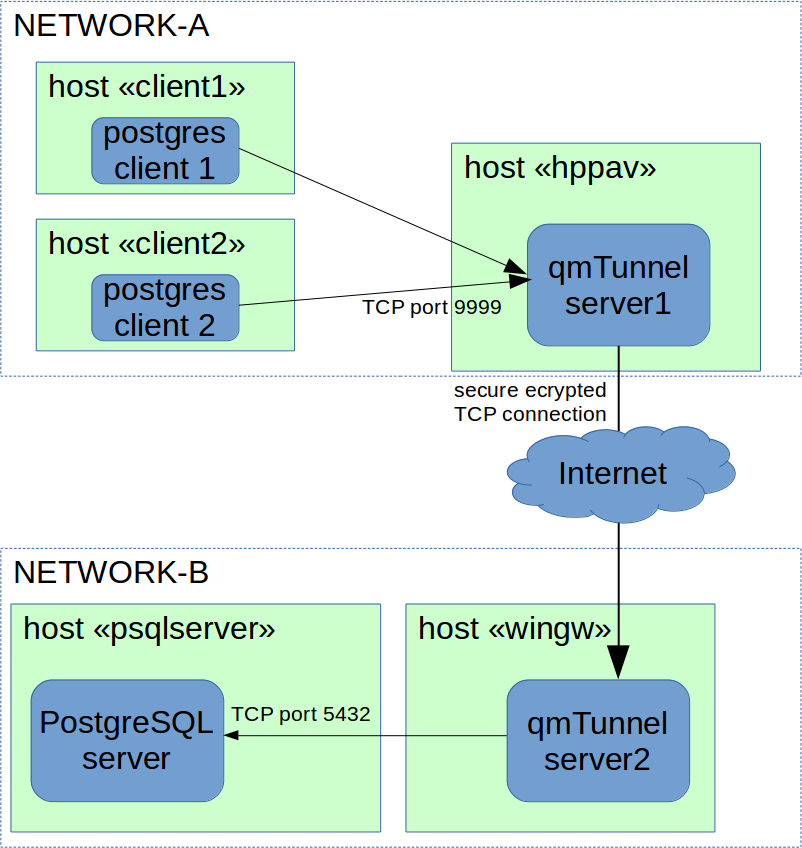
Now let’s create a simple local-forwarding tunnel.
Let’s suppose that the second server is located in a remote network with a PostgreSQL server we need to access like this:
Return to qmtunnel-gui, right-click on our connected qmtunnel server and choose
Create new tunnel...:
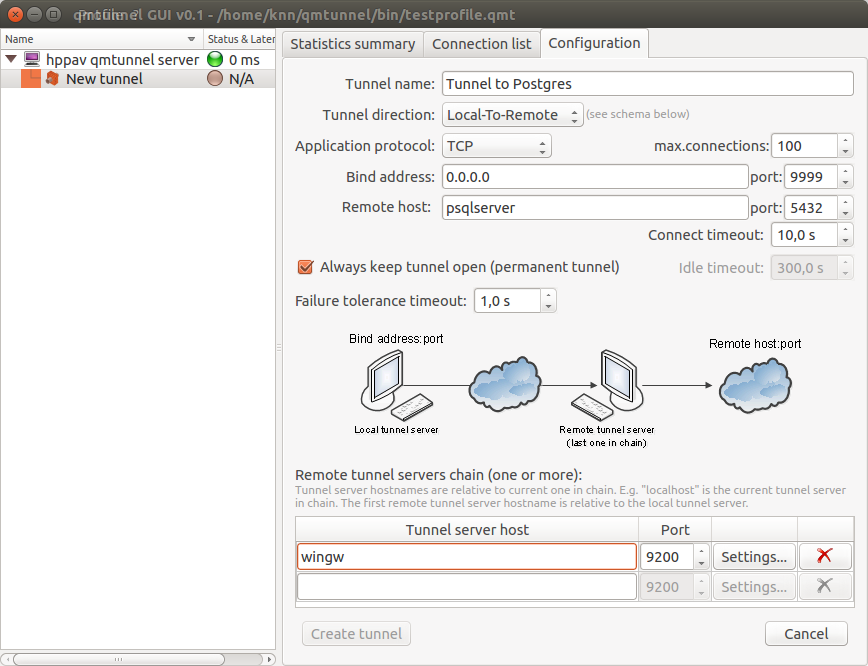
Fill up the following fields:
- Tunnel name - specify any tunnel name you want.
- Bind address - set to
0.0.0.0if you want to share the tunnel with other hosts in your network, or127.0.0.1to make the tunnel available only from the current qmTunnel server host (“hppav”). - port (bind port) - set to any port available.
9999was chosen for demonstration purposes. You can enter the same port as destination (5432) if it’s available on qmTunnel host. This is the port your service/application client would connect to on the first qmTunnel server host. - Remote host - set to IP address or domain name of destination service/application
host. This is relative to the final qmTunnel server in chain and must be known on it.
In the example above host “psqlserver” should be known on and available from “wingw”
host. If you need to connect to the service/application located directly on the
final qmTunnel host, you should enter
localhostor127.0.0.1here. - port (remote port) - set to final destination service/application port on remote host. This is where you actually want to connect to.
- Always keep tunnel open - Set this flag if you want this tunnel to be permanent and auto-reconnect when needed.
- Remote tunnel servers chain - add all qmTunnel servers in chain here except the first one. Be careful with domain/hostnames - they are also relative (should be known on and available from) each from previous one.
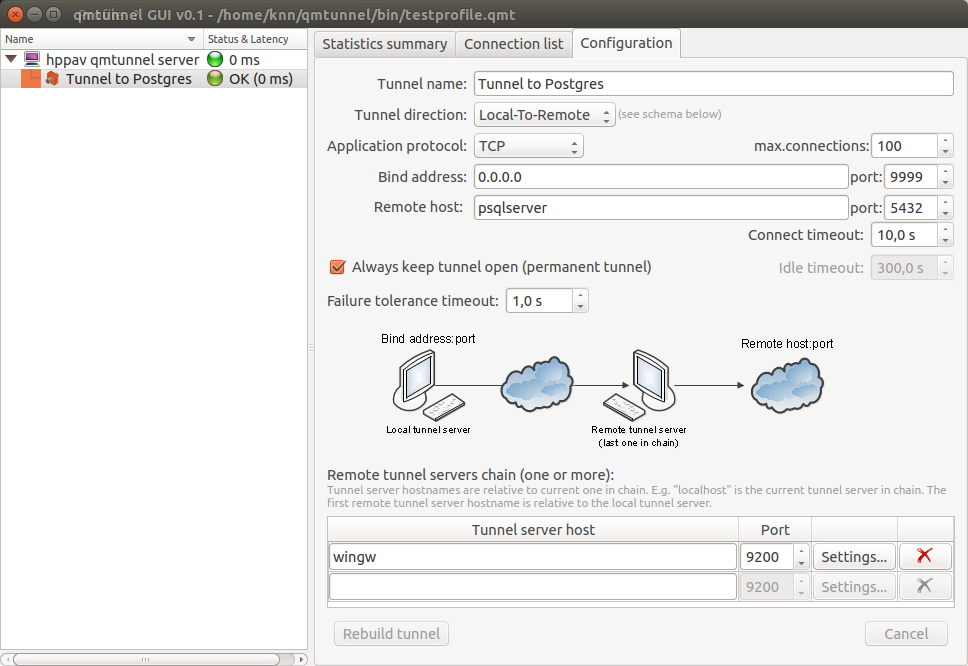
Then press the Create tunnel button.
If everything is correct, you will see green indicator for your newly created tunnel:
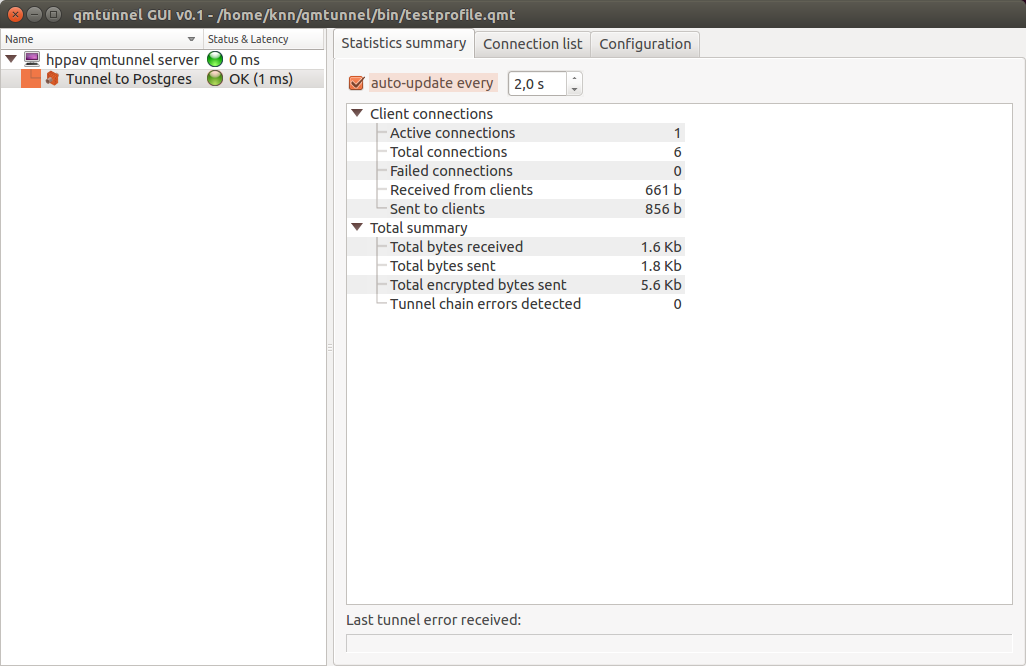
Now you can check the postgres connection to “hppav” which is transparently tunneled to “psqlserver”:
psql -h hppav -p 9999 -U postgres postgres
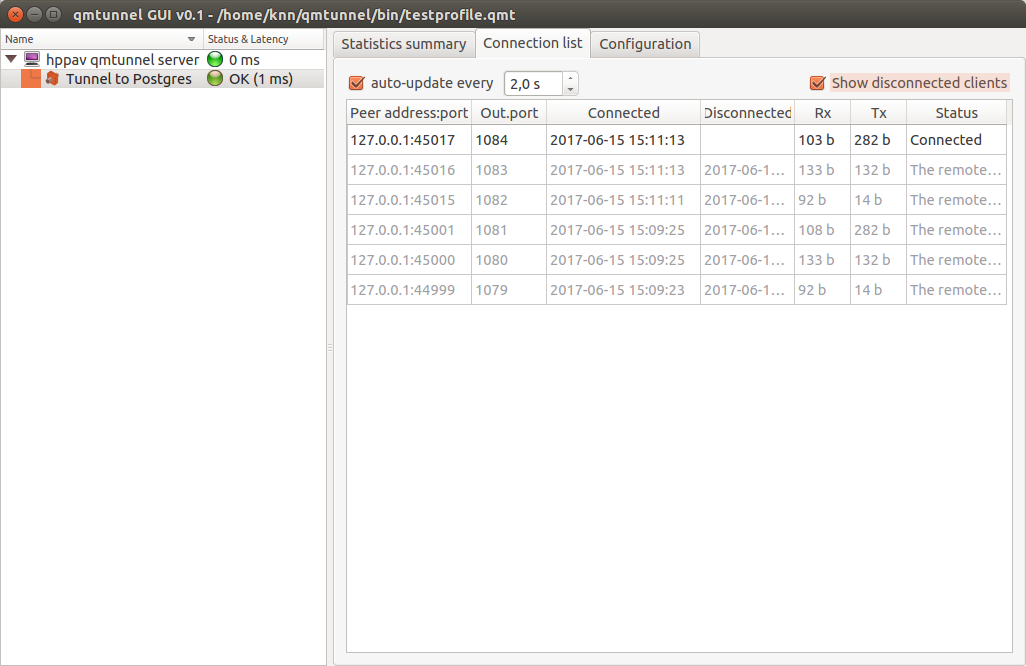
You can now also monitor tunnel activity: